- Step 1 : Getting Started with Mudiad Meithrin on Wootzoo
- Step 2 : Creating Contracts & Invoicing
- Step 3 : Day to Day Management Tasks
Step 3 : Day to Day Management Tasks
Now you’re all set up, taking registrations and payments, it’s time to get into the day-to-day management tasks where you will be spending the bulk of your time, sending communications and updates to parents.
Each section is split into chapters, so you can easily skip to the relevent part.
Post to your timeline
To begin, why not wish your new customers a warm welcome and post to your public feed? You can do this directly from your dashboard.
Adding an image and text is optional. All your posts are available to view and edit from ‘Your Activity Feed’ in your Dashboard.
Parents can view and comment on posts from their dashboard.
Adding menus and managing meal updates.
Left Hand Menu > Cylch Name > Menus
Wootzoo is flexible in terms of how you wish to manage and communicate meal (and bottle feed) updates to parents. You can set up Wootzoo to automate which meal is current by setting up menus and meals. Or you can choose a simpler approach and update the parent ad hoc with ‘breakfast’, ‘lunch’, ‘dinner’ etc., as you go.
If you wish to fully automate meal times, you can start by going into the ‘Menus’ screen from your Cylch homepage (Found in the left-hand menu in pink), and choosing ‘Menus’.
From within the ‘Menus’ screen, create a Menu. Give the menu a name and an optional description.
Creating a Menu
You can also set it as an ‘Active Menu’. This is also how you set the current menu, if you have more than one menu.
Adding Days to Menu
Once the menu has been created, you can add the relevant days to the menu. Add the days you wish.
Adding Meals to Days
You can create a new meal to add to the day or add an existing meal.
Note: You cannot add the same meal to two different slots on the same day. Create separate meals if you wish to add to the same day.
Copying meals from one day to another: You can copy meals from one day to another by selecting which day to copy the currently selected day to from the ‘Copy Meals to Day’ dropdown.
In our video, we have already created a menu and are adding the remaining days of the week.
You can add multiple menus if you rotate your menu once a week or however you choose.
Once your meals and menus are set up, you can now automatically pull through the meal for that time of day.
Note: You will need to set a menu as ‘Active’. This is done from Settings.
Day to Day Updates
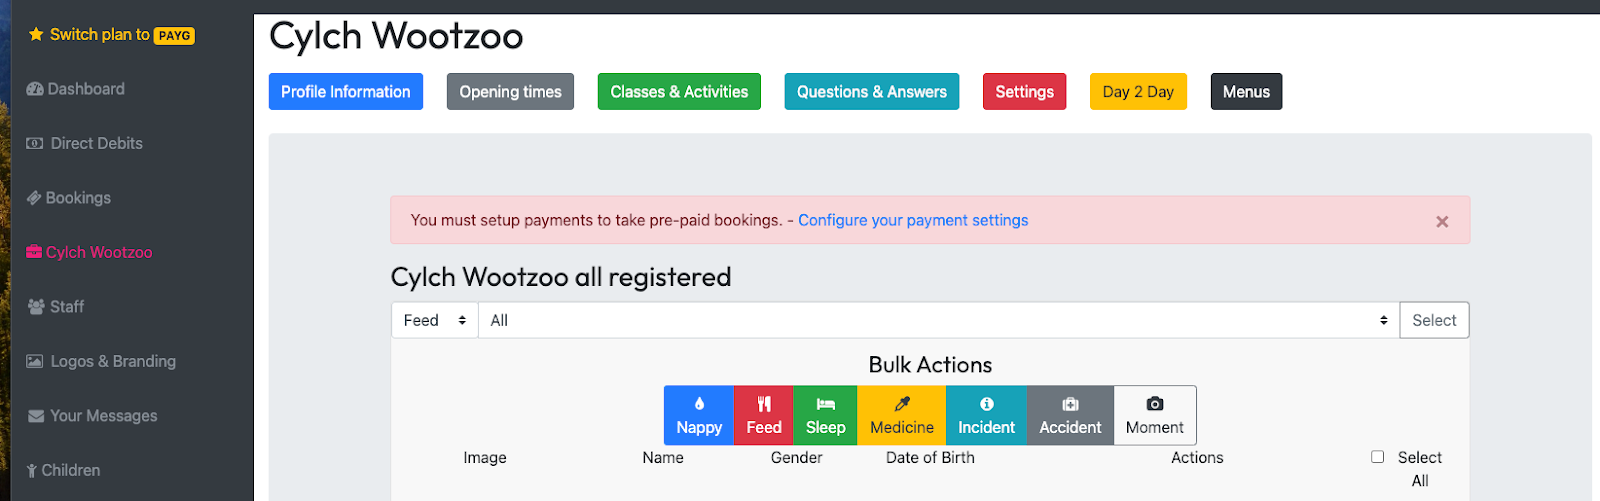
2. Bulk Actions
From your Clych page, click on the yellow ‘Day 2 Day’ button.
The Day 2 Day view shows all registered children. You can ‘bulk update’ from here in a number of ways. From this view, you can select the relevant children you wish to update from the Select box on the right or choose ’Select All’ then choose an Action to update.
For example, if you wanted to do a ‘Sleep’ update for the selected children, choose ‘Sleep’ from the big Bulk Actions menu across the top. This allows you to update the selected children with the same information.
You can also bulk update for Feed, Sleep, or Nappy and add custom information for each child. From the dropdown menu at the top, choose which action to update and for which group, or select ‘All’ for all children, and hit select. This will give you a list of children where you can quickly add optional information and click ‘Update’.
If you prefer to update children individually, you can do that too. Just select the appropriate action from the update menu next to the child’s details in the row. This option gives you more control over individual updates.
Parents can view a daily summary of these updates by clicking on ‘Show Daily View’ in their dashboard.
Any updates you make for a child are viewable and editable from the child’s profile. You can access a child’s profile page using the Global Search in the top right corner or from the ‘Children’ link on the left-hand side menu.
You can also post to the parent’s feed privately. A private post goes directly to the Dashboard feed, specifically for that child and parent.
You can add private internal notes as well. These notes are viewable only by yourself and your staff members.
Responsible adults, pulled in from the P1 form, and guardians, added by the parent are also viewable from the child’s profile page as default.
You can also ‘pin’ specific questions and answers from your Q&A’s to appear here too!
Groups
Organizing children into groups is a handy way to segment registered children.
Click on ‘Groups’ from the left-hand side menu.
To create a new group, click “Create Group”. Here, you can give the Group a name and an optional description.
Once the group has been created you can add children, either by scrolling to the bottom of the Group page and selecting from the dropdown or by clicking into the group name and adding children from there.
You can create an unlimited amount of groups and add children to as many groups as you wish.
You can message by group and post to a group member’s dashboard feed, from your main Dashboard. This means only your customers in that specific group will receive the update.
Magic Moments
Wootzoo also allows you to send Medicine, Incident, and Accident reports. Sending these reports is the same as creating Meal, Sleep, and Feed updates. In our example here, we’ll focus on creating and editing a ‘Magic Moment’ as it has a bit more added functionality than the other daily reporting tools.
Moments are special moments or milestones that can be related to anything you want. Maybe something relating to a curriculum milestone, or a first word. You decide.
To create a magic moment, do this either from the child’s profile or from the Day 2 Day screen. Select the child you wish to create the moment for and click on the ‘Moment’ button.
Add a title, date, description, and some images to capture the special moment and click ‘Add Moment’.
If the moment does relate to a specific milestone in your curriculum you can choose to give it an ‘Official Milestone’ status. You also have the option to post to the parent’s feed.
The great thing about moments is that parents can view the moments in a specially curated slideshow.